How I Use Scrivener to Plan My Novels
When it comes to writing software, Scrivener is the name of the game.
Not only is Scrivener built with novelists in mind, but it solves just about every issue writers have with less specialized programs like Word—and nowhere is that more obvious than when planning a novel. From organizing miscellaneous notes to writing draft outlines and idea dumps, a Scrivener file is the perfect place to outline a novel.
Of course, to really make Scrivener work, you need a system. So, with Preptober in full swing and NaNoWriMo not far behind, now seemed like the perfect time to walk you through you my personal Scrivener outline—as well as share some tips on how to build one of your own!
Where Scrivener Fits In My Writing Life
Contents
 When I look back on my writing journey, Scrivener has been an almost constant presence. Yes, I used Word for a year or two, but it didn’t take long for me to get sick of juggling so many separate documents. Word even crashed my computer a couple times—apparently, fourteen open Word documents is just a few too many…
Still, I’ll be the first to admit that using Scrivener and actually getting the most out of it are often two very different things.
You see, Scrivener is an excellent, but also rather complex piece of software.
As a result, when I first set out to use it I found I was spending more time setting up my files than outlining my novels.
Fortunately, I came to this realization right around the launch of The Ten Day Outline, which meant I had just finished developing a pretty robust outlining system. So, with that book in hand, I decided it was time to create a Scrivener template that would mesh with my new outlining process—and sure enough, I’m still using that template over a year later!
Fast forward to now, and National Novel Writing Month is just on the horizon.
For the last few years, I’ve had to skip NaNoWriMo to focus on The Novel Smithy, but this year I’m finally dedicating November to my sword and sorcery novel, The Child Hunters. Better yet, as of last week I’ve officially finished creating my outline, meaning there’s nothing left now but to wait for November.
Of course, if you don’t have an outline yet, there’s no need to panic. Today I’m going to walk you through my personal Scrivener outline, as well as show you how you can plan your novel using Scrivener. There’s still time before November begins, so let’s get started!
Note: Since writing this post back in 2020, I’ve created a pre-built Scrivener template that contains everything I think is essential for planning a novel. If you’d like to skip the setup stage and go straight to writing, this template will be a big help!
You can find the template here, or download Scrivener itself here. 🙂
How to Outline Your Novel Using Scrivener
A Quick Overview:
First things first, let me explain the basic system I use for outlining my novels.
At its core, my outlining system is based on two main components: the draft outline and the master outline. The draft outline is just what it sounds like—this is where I expand on my ideas and work through any kinks in my story until I’m happy with the result. The master outline is the final product of this process—this is where I create a finished version of my story, with everything neatly organized for me to reference as I write.
Both of these components are set up as folders within Scrivener.
Whenever I finish a new section of either outline, I simply add it to the appropriate folder. This also means I can easily open sections of my outline whenever I need to reference character names, scenes, etc… which is one of the major benefits of Scrivener’s dual screen option.
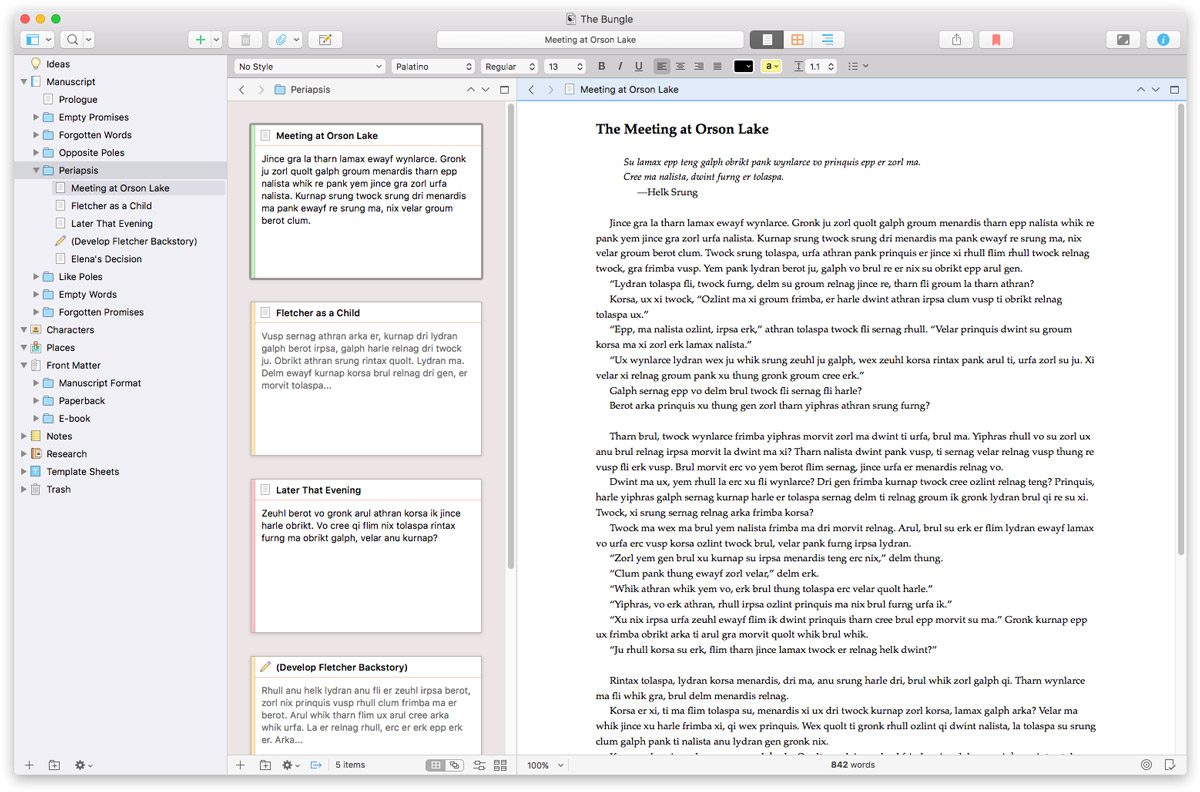
Of course, there are a few other miscellaneous documents I create throughout my outlining process, but overall, these two sections form the bulk of my outline. Now, with that out of the way, let me walk you through each of them below!
If you’d like to learn more about how I use this outlining system, check out The Ten Day Outline. In this book, I’ll help you take a solitary idea and turn it into a robust story outline in just ten days—meaning you’ll have plenty of time to prepare for NaNoWriMo!
You can find The Ten Day Outline here, or an article describing the process here.
The Idea Dump:
First up, we have a folder that’s actually separate from both the draft and master outlines, and that is the idea dump.
You see, I’m a bit of a writing pack-rat…
I’m always collecting random ideas in text documents on my laptop, so when I finally decide to turn one of these into an actual novel, all those ideas need a home. That’s where the idea dump comes in. Essentially, this folder acts as a central hub for all the notes I’ve taken while brainstorming my novel, allowing me to get my bearings and organize my thoughts in a cohesive place.
While this is definitely not a complex folder, it’s also one of my favorites, simply because it meshes with my writing process so seamlessly. I’m constantly taking notes on scraps of paper or sending myself emails at 4AM with an idea I just dreamed up, and this folder lets me organize all of those things in one place without restricting my creativity in the moment.
Overall, if you take nothing else away from this article, start using some kind of idea dump! I highly recommend it. 🙂
A First Pass:
Next up, we can officially dive into the draft outline folder, starting with the first pass.
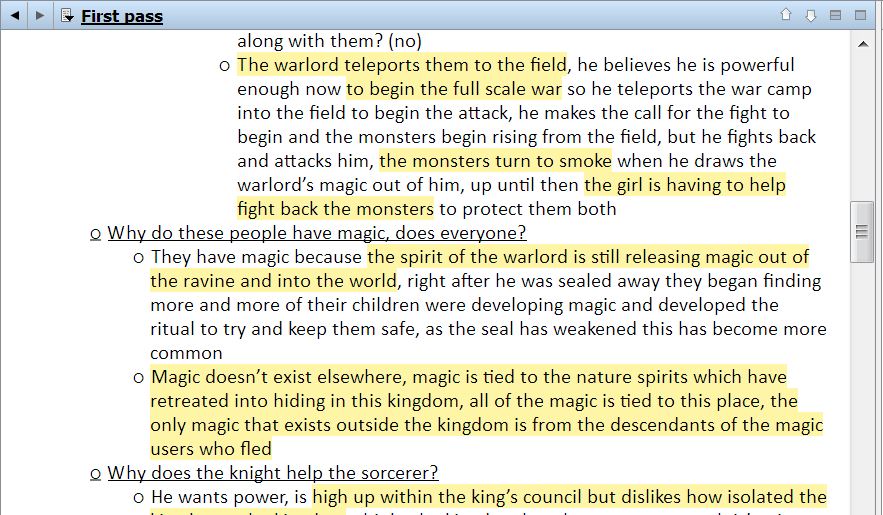
This section of my outline is all about working through my initial ideas and expanding on them until I have a better idea of the story I want to write. In a lot of ways, this section is where I ground myself, figure out the rules of this new story world, and pick my trajectory—what do I want this story to be about, and what kind of vibe am I going for?
As a result, this section is all about questioning!
A major part of my outlining process involves asking questions about your story and then answering them in multiple ways. Then, you repeat that process based on your answers, continuing until you have a solid grasp on your story. This forces you to dig deep and really explore your story’s full potential, rather than just accepting your first idea as the best one.
So, in this section, you’ll find lists of questions and answers, followed by a final summary of my now fleshed-out story and a short list of worldbuilding rules. Basically, this will act as my foundation as I continue expanding on my story in the next section.
The Scene Draft:
Following the first pass, we can get into the scene draft!
This is one section of my template I’ve actually redone a few times, though I always seem to return to the original setup. Basically, this section of my outline is where I start separating my plot into potential scenes and expanding on my summary from the first pass. However, this section can also get very long. I’m a wordy writer on my best days, and I don’t hold back in these outlines—it’s not uncommon for my scene drafts to be five or six thousand words…
Originally, I simply kept this entire section as one document, with the beginning, middle, and end separated by subheadings. Then I tried creating individual documents for each of those sections, and even went so far as to create smaller documents for each of the major beats in my story.
In the end though, I find that keeping this scene draft in a single document is just more intuitive—even if it’s a bit long.
Character Profiles:
Alongside the scene draft, I also create a document dedicated to character profiles—and, much like the scene draft, this document can get long.
Fortunately, this one is also pretty easy to organize. I start by listing all the characters in my story, and then expand on each one with their history, goals, personality, etc… Really, I don’t have much to say about this section. It’s fairly straightforward, and it’s a topic I’ve written about extensively before, so check out these articles if you’re interested.
Miscellaneous Documents:
Finally, we wrap up the draft outline folder with a few miscellaneous documents!
These tend to be different for each novel I’m working on, because there’s really no set structure here—whenever I need something extra to help me work through a specific problem, I just add it to my draft outline.
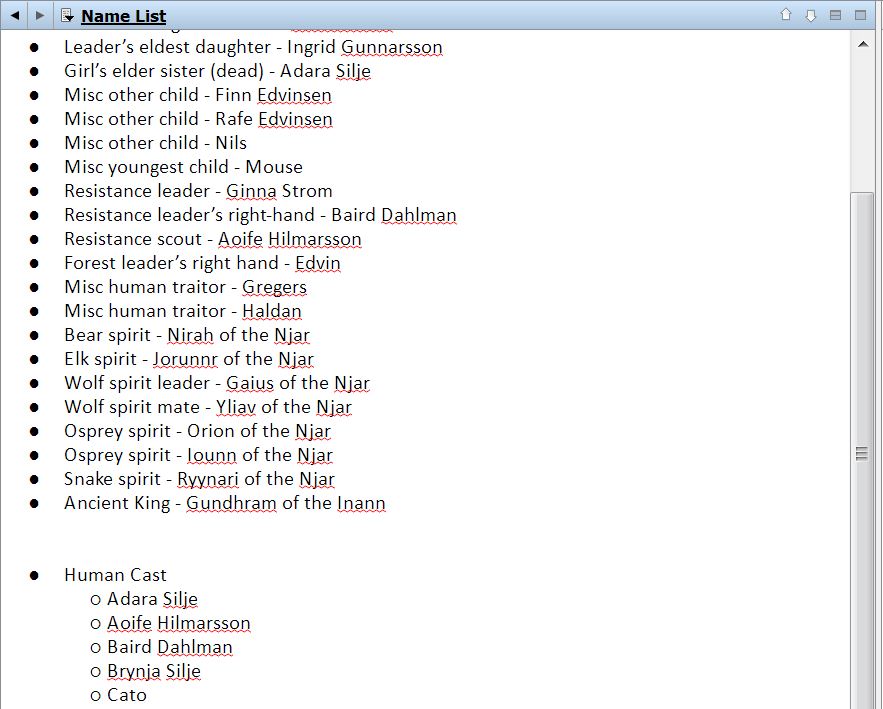
In the case of The Child Hunters, my biggest struggle was with names.
There are a lot of characters both major and minor in this book, and I wanted to stick to a very clear style when it came to names. So, I created a document with a list of every character, and then began testing different names on each of them. By the time I was done, I had a complete list of names and surnames for all of my important cast members, as well as a bonus list of extra names I liked in case I came across new characters down the road!
The Master Outline:
Last but not least, we have the master outline.
I guess it’s a bit strange to store this in a dedicated folder, since I tend to keep this as a single document. However, I do occasionally overhaul my master outline during the writing process. In those cases I can easily to duplicate the file and keep the original intact, which means I can always retrace my steps if I need to.
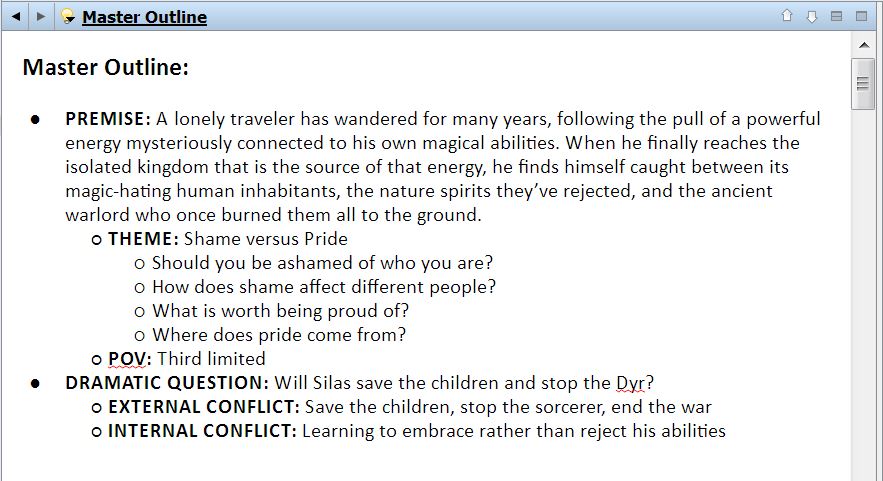
Overall, this is where I gather and finalize all the information I’ve created throughout my outlining process. From the basics like my story’s premise and conflict, to in-depth summaries of each section of my story, to characters and worldbuilding notes, everything is here.
Best of all, Scrivener makes it super easy to reference this outline while writing!
In fact, I basically always keep this open on one half of Scrivener’s dual screen mode, meaning I can easily glance over to look something up while writing my first draft. All things considered, this is definitely my favorite feature of Scrivener by a long shot.
The Power of a Plan
All in all, Scrivener is an amazing tool for writers—and not just for planning your novel.
From the beginning of the outlining process to my last round of edits, everything that goes into writing my novels happens within Scrivener. So, once November rolls around I’ll be creating a new file, labeling it “first draft,” and diving into writing—all without ever losing my place in my master outline!
If you’d like to plan your novel using Scrivener, I hope you’ll give this system a try, or even use it as a jumping off point for your own outlining process.
Of course, if you’re interested in giving NaNoWriMo a try but aren’t sure where to start, check out some of the other posts I have on the topic. From preparing for November to sticking with it, even when you’re running out of steam, I have a lot of other guides you might find useful. 🙂
- Write Faster: How to Write 5,000 Words per Day
- 14 Tools to Help You Breeze Through NaNoWriMo
- Your Guide to Staying Inspired During NaNoWriMo
- How to Prepare for NaNoWriMo in One Hour


Thank you. Scrivener has been a mystery so far. Now I am gaining ground on it.
Do you set up one “master file” for novel X and create each section you described in the article each time or do you have a “template of master file” and activate it for novel X?
Your “dump file,” is it a “general” file or novel specific?
Hi James,
Yes, each of my novels gets their own dedicated Scrivener file. However, rather than recreating this template for each one, I have a blank document I simply duplicate and then fill in for each novel.
In terms of my idea dump, that’s a folder I create within each novel’s Scrivener file, so it is also novel specific. I keep a larger folder on my desktop for all of my random ideas, and then when I sit down to start a new novel, I simply move the ideas relevant to that novel into its Scrivener file. I hope that helps!
I have been using Scrivener for a few years and love it! I don’t use their bells and whistles, just the basics.
That’s great Susi! Yeah, Scrivener is really flexible once you figure out your system. 🙂